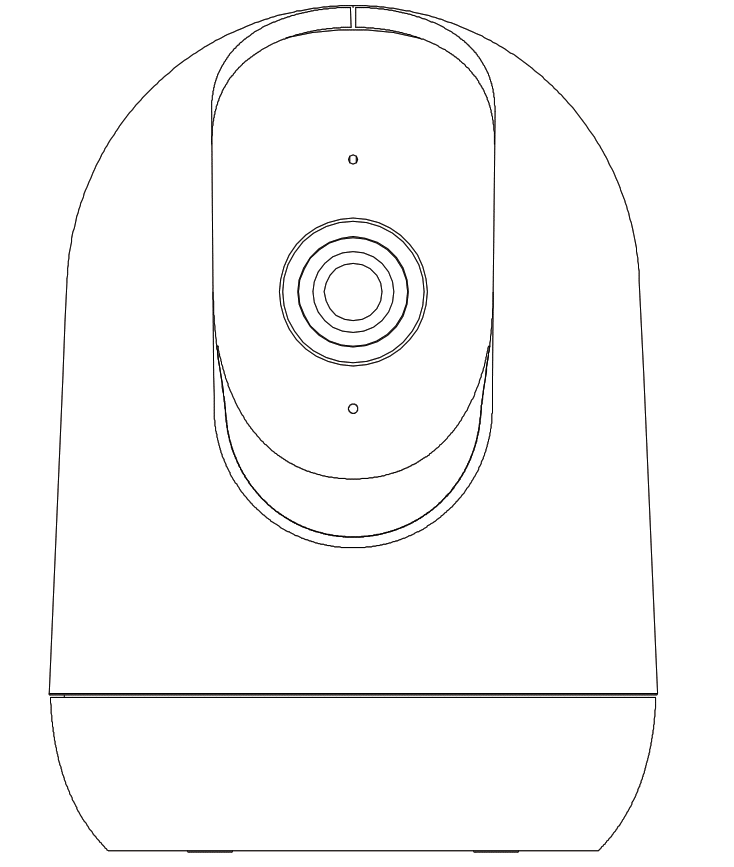
Camera Introduction
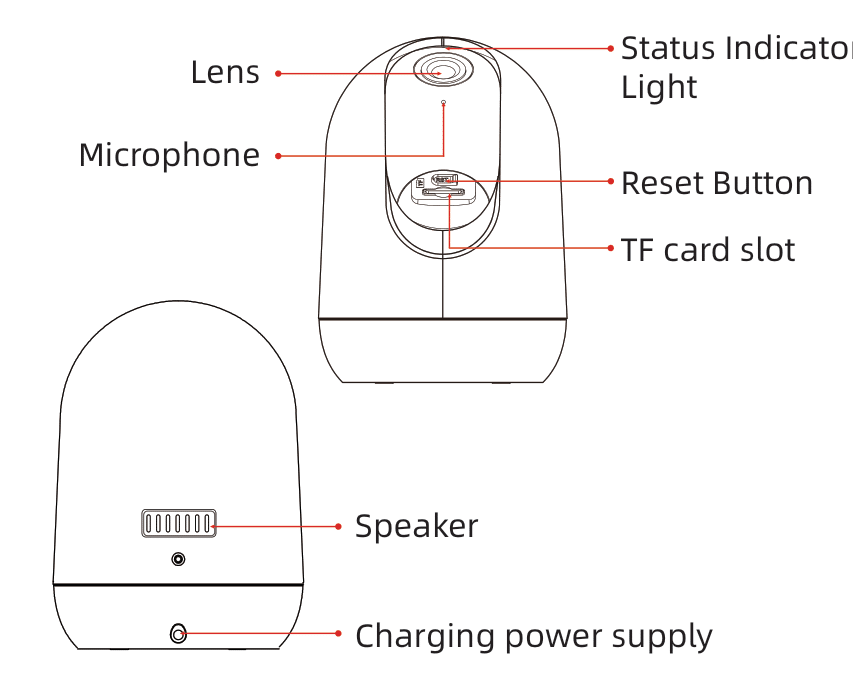
*Please reset the camera before connecting to the APP.
| Reset Button | Press and hold for 5 seconds until hearing Boo gu’ sound to reset |
| TF card slot | Support local TF card storage (up to 128G) |
| Lens | Support QHD resolution |
| LED Indicator Status | Press and hold for 5 seconds until hearing Boo Gu’s sound to reset |
Download & Install App
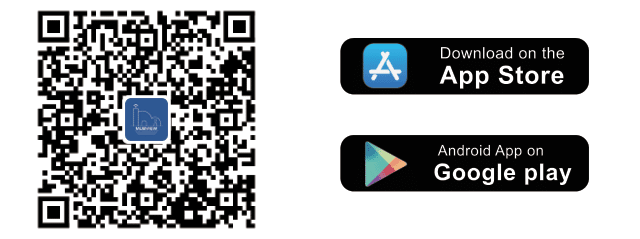
The camera supports Android and iOS systems. Please scan the QR code below or search ‘MUBVIEW’ in the App Store to download the App and follow the instructions to register the account. If you encounter any problems during the installation process, please feel free to contact us.
Account Registration
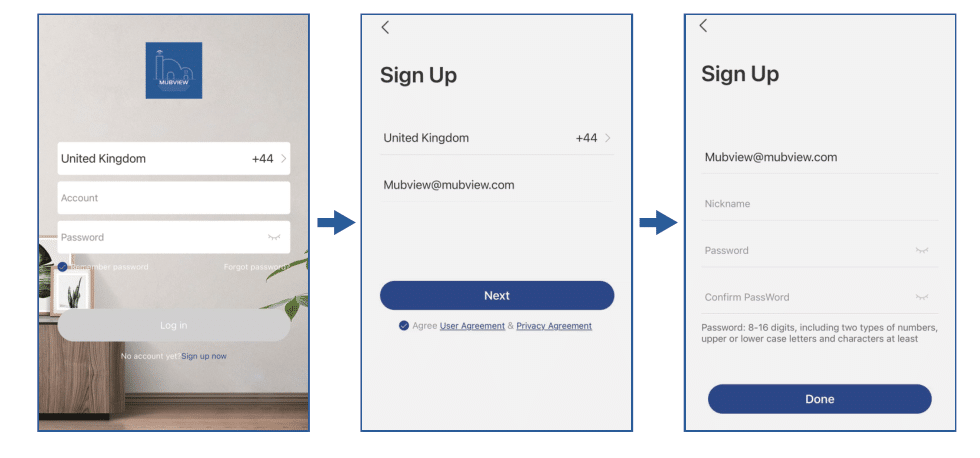
Sign up in the App with your email address.
Choose your region and correct country code (Users from different regions cannot share the camera).
Preparations for Connection
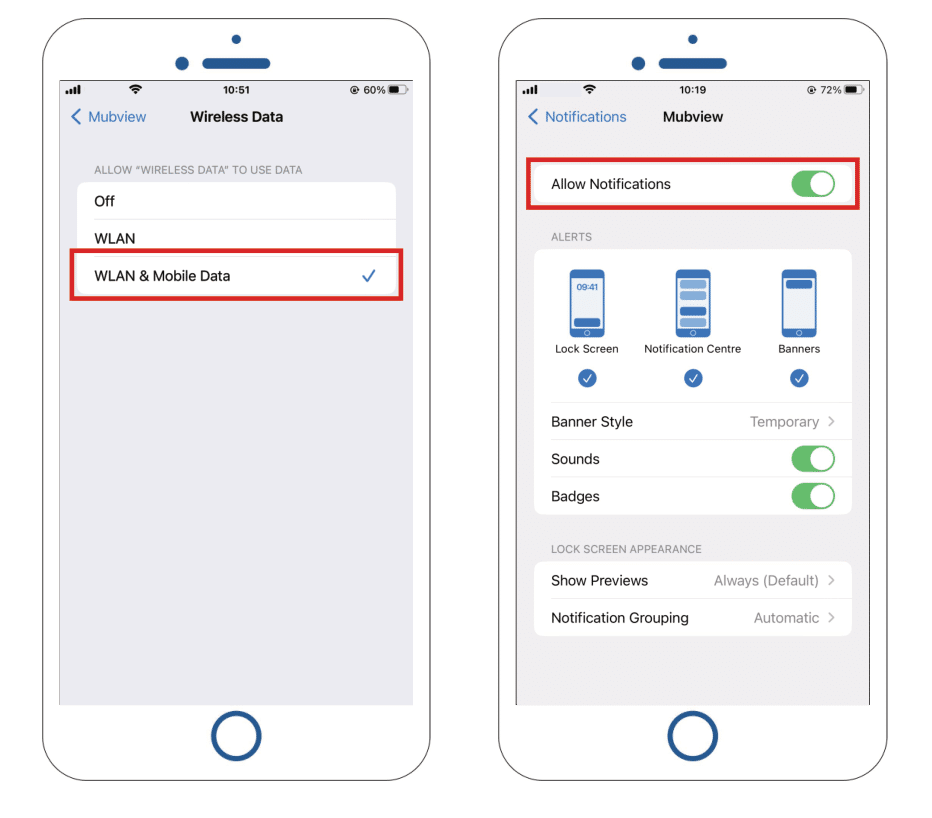
1. Allow the ‘MUBVIEW’ App to access mobile cellular data and wireless LAN, or it will fail to add a camera.
2. Allow the ‘MUBVIEW’ App to receive pop-up messages. Otherwise, the smartphone will not receive a notification when motion is detected.
① MUBVIEW offers free 7-day cloud storage with the basic version, or you can insert a Micro SD card into the camera to store videos.
② The camera works with 2.4GHz and 5GHz Wi-Fi.
③ When connecting to the network, please take the camera closer to your WiFi router to ensure a stable network signal.
Connect the Camera to the App
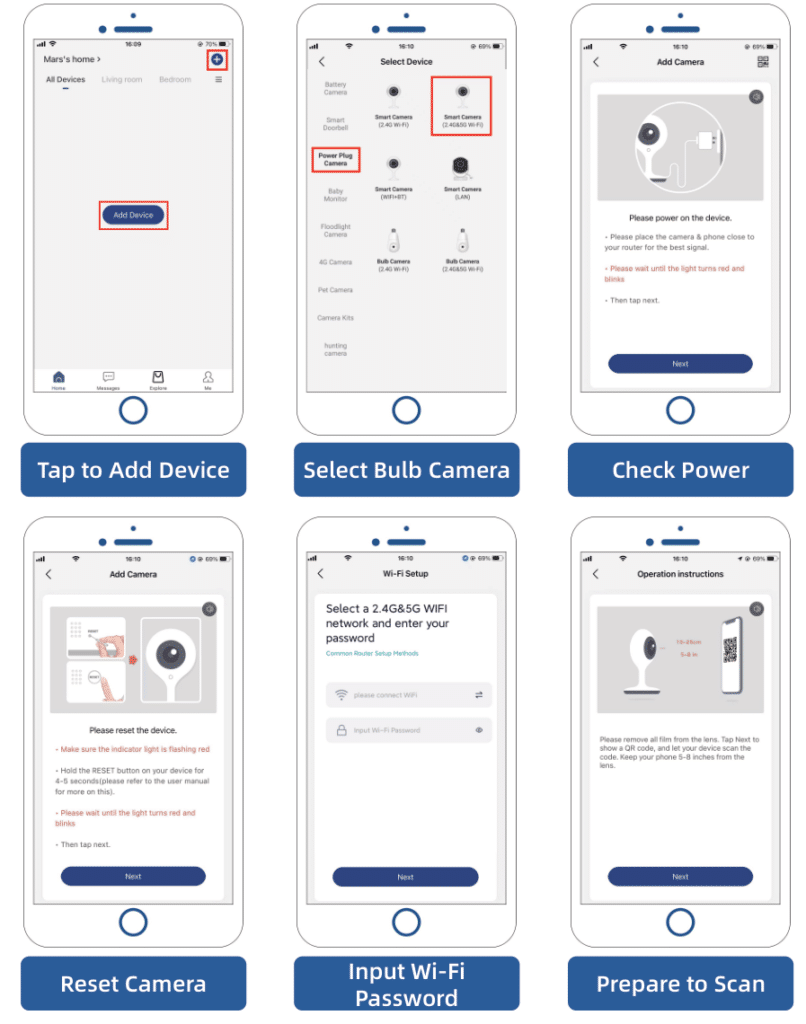
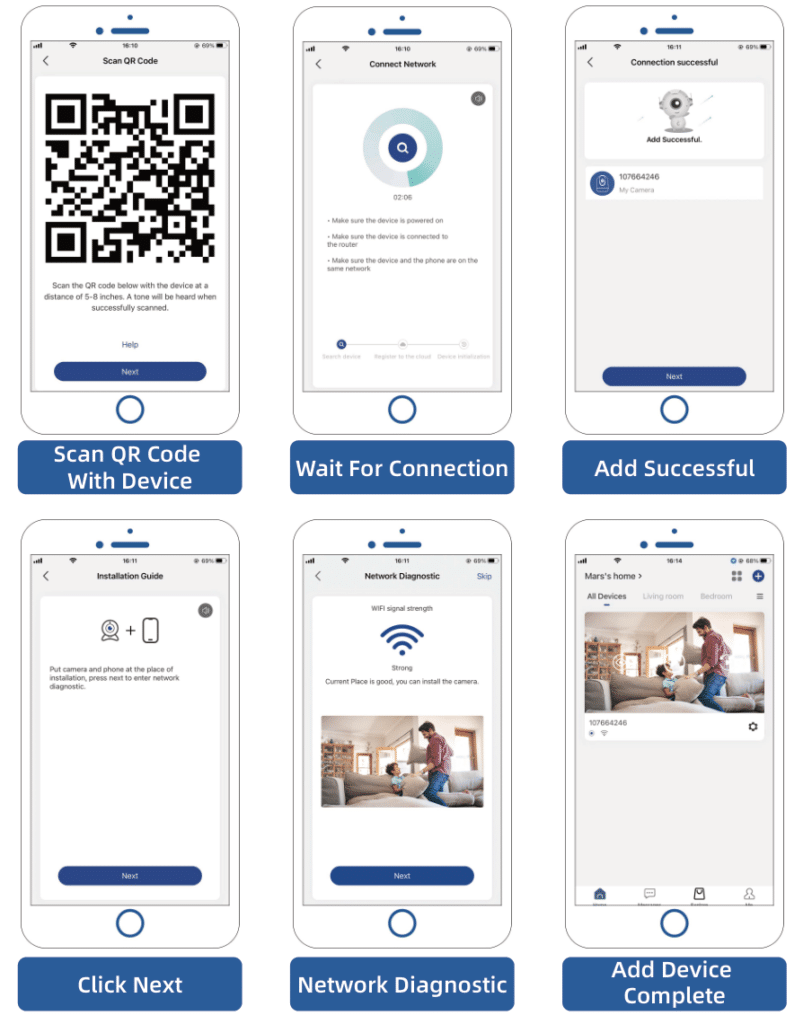
Note: If the camera fails to connect to the network, please move the camera closer to the Wi-Fi router, then press and hold the “Reset” button for more than 5 seconds. Once you hear the prompt sound, reconnect the camera. If the issue persists, please email us at [email protected]
Multi-User Sharing
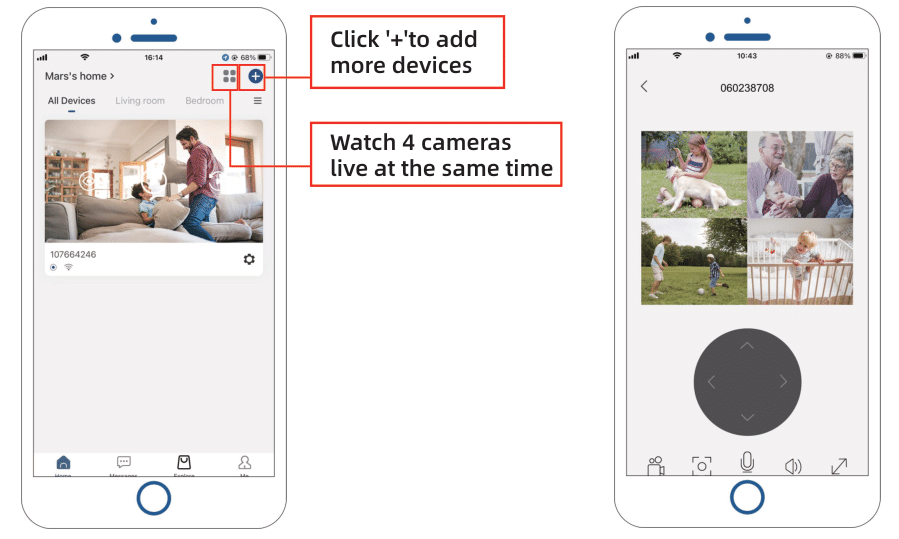
The camera can be shared with others in two ways:
1. Let her/him view but cannot control the camera.
2. Let her/him view and control the camera.
Share steps:
1. Camera Users download the app to their phone and register their new account in the app.
2. Click ‘Add’ in the App on the Camera Owner’s phone.
3. The Camera Owner scans the Camera User’s QR Code or inputs the Camera User’s account ID.
4. Camera User accepts share.
FAQs
Q: Failed to add during network configuration?
A: Please turn on the camera and power it on, press and hold the Reset button for more than 5 seconds, after the camera is reset successfully, reconnect the camera, if it still fails, please contact [email protected]
Q: After the scan adding is still unsuccessful?
A: Restart the device or power off the device after scanadding is still unsuccessful, and then try to add it again.
Q: The device cannot preview normally.
A: Please check if the network signal is too weak, pleaseput the camera close to the router, if still cannot review, reset the camera and add it again.
Q: After resetting the device, why is the camera still in the device list?
A: Resetting the device only to reset the network configuration but cannot change the configuration on the APP to delete the camera you must log in to the APP to delete it.
Q: How to switch the camera network to another router?
A: First remove and reset the device on the APP and then configure the network for the device again through the APP